2. Surface Design Study
Project 2: Surface Design Study
Research:
My friend and I went to browse Walmart to see what we could find. The bedding section really inspired me. I didn’t feel very connected to any super complicated patterns or many with curved lines. I found one bed spread with a detached hexagon sort of pattern, and I thought “I wonder what that would look like as a diamond shape, so that’s where I drew my inspiration for the more geometric part of the pattern.
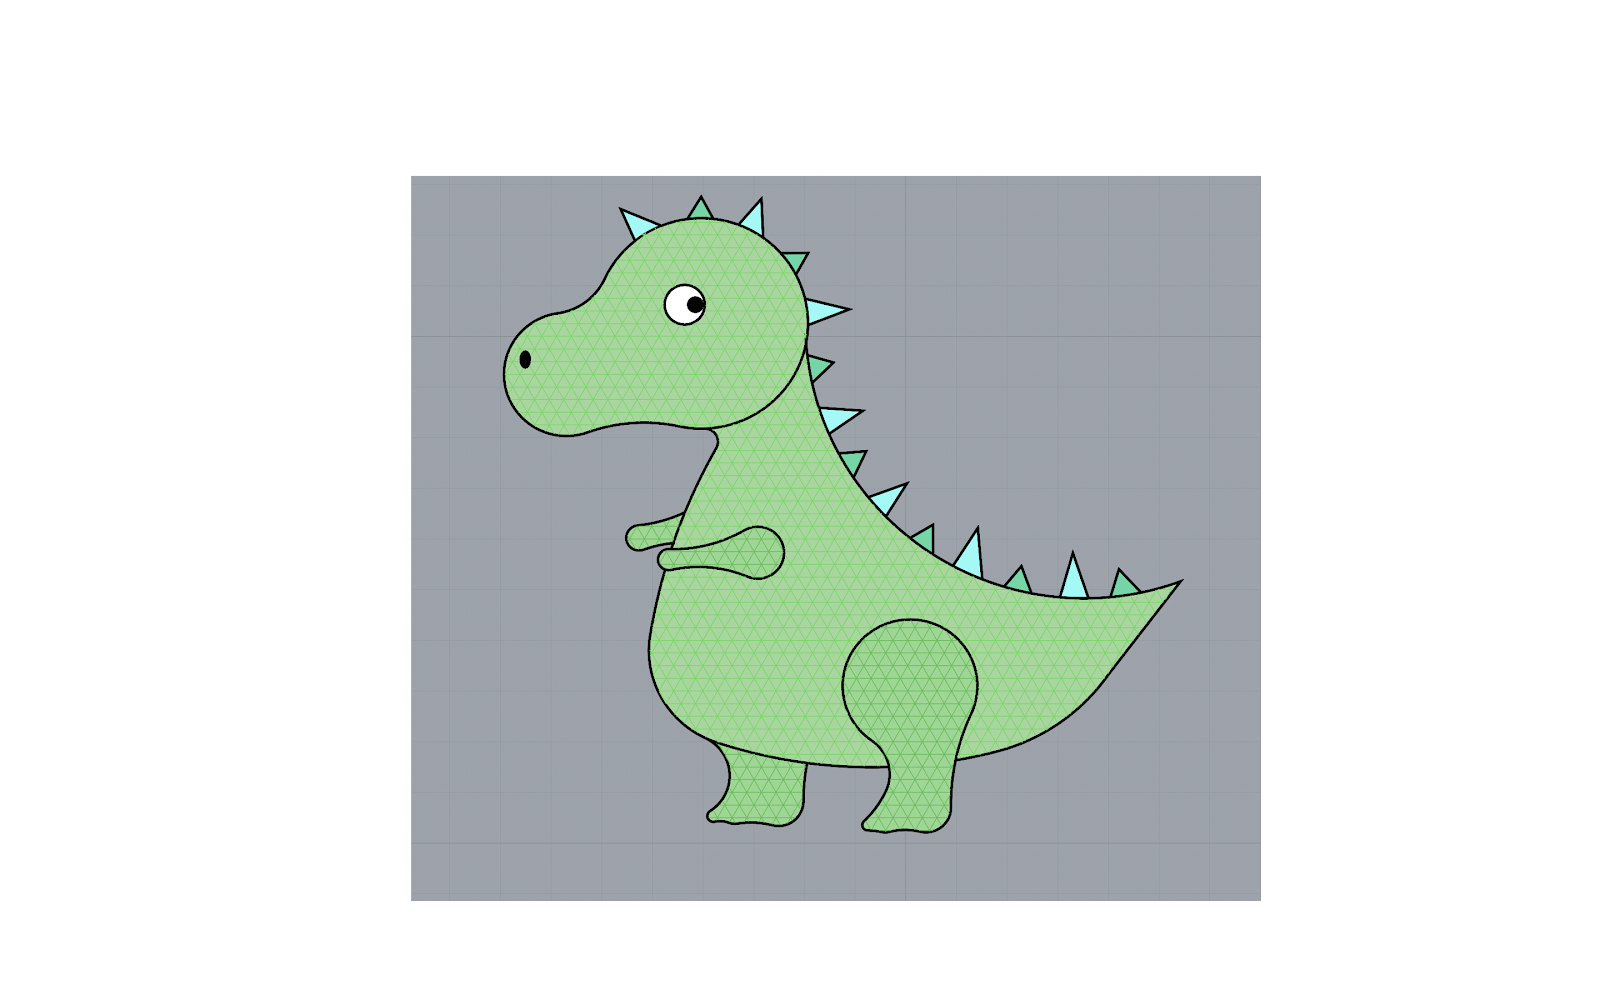
When we reached the clothing section of our design scavenger hunt, I found this cute little dinosaur pattern. I thought “that could be cool” but I doubted that I would actually be able to construct a dinosaur with my limited experience with Rhino. I couldn’t get the dinosaur idea out of my head, so that is what I decided to go with. I regret not getting a picture the original pattern, but it was just a very simple dinosaur pattern on a pair of kid’s pajamas.
This project really proved to be a challenge for me. It was very beneficial to have done the 2-D shape study from last week, because I can confidently say that I would not have been able to compete this project without it.


Development:
During the group critique session last week, my group and I agreed that the dino’s name should be Timothy. We discussed colour palette and I ended up setting on an array of pastel green for the dinosaurs and a light gray for the diamonds (most of which I ended up changing because it seemed a little bit too soft and I wanted it to be more playful). Also, initially all of the dinos inside the geometric form were facing the same direction, my group thought it would look better if the dinosaurs mirrored each other, so it looked like they were reaching for each other. I toyed with the idea of having multiple kinda of dinosaurs scattering the pattern, but in the end it just seemed like the pattern would be too busy if I did that.


Successes:
- I finally figured out the copy and rotate tool, which for some reason I had a really hard time wrapping my head around last week.
- The actual construction of the dinosaur wad easier than expected. Still time consuming, but I initially doubted that I would actually be able to construct that kind of shape in the first place.
Challenges:
- Because the dinosaur is not a geometrical shape, sometimes, even when snapped to the middle of an object, it appears to be not centred or off balance, so I did choose to move some of the dinos slightly off their center, just due to personal preference.
- When I began hatching the dinosaur, I had some issues. The body of the dinosaur wouldn’t select. Upon further investigation, the issue was that there were some inconsistencies with the shape and it wasn’t fully connected to the head of the dinosaur.
Tools Used:
- A lot of tangent arcs were used in the construction of this dinosaur. I created the structure of the dinosaur using circles, then used the arc tool to bridge them all together. I had to do a lot of trimming when it came it came to adding the spikes to the back of the dinosaur.
- Mirror: I used mirror to flip the dinosaurs so that they were facing each other.
- Array: I used array to copy the core structure of the pattern. When I was using the command, I realized that it wasn’t fitting my diamond shapes as interlocked as I wanted them to be, which is why I decided to place the dinosaurs in alternating colours in between the gaps (which I actually like better than my initial plan).
- Hatch: This was my first time using the hatch tool. After experimenting with the pastel green palette I had planned on, I thought it looked too dull, so I experimented with more bold colours. The plan was just to have the green dinosaur throughout the pattern, but after completing the pattern, I thought it looked boring, so I added a dinosaur with hatched shades of blue. both the body and the legs/arm of the dinosaurs actually have two hatches: a sold hatch for the base colour and a triangular grid hatch in a darker colour overtop.
- Rotate: the diamonds with the dinosaurs inside were rotated so that the coloured dinosaurs were alternated in orientation.


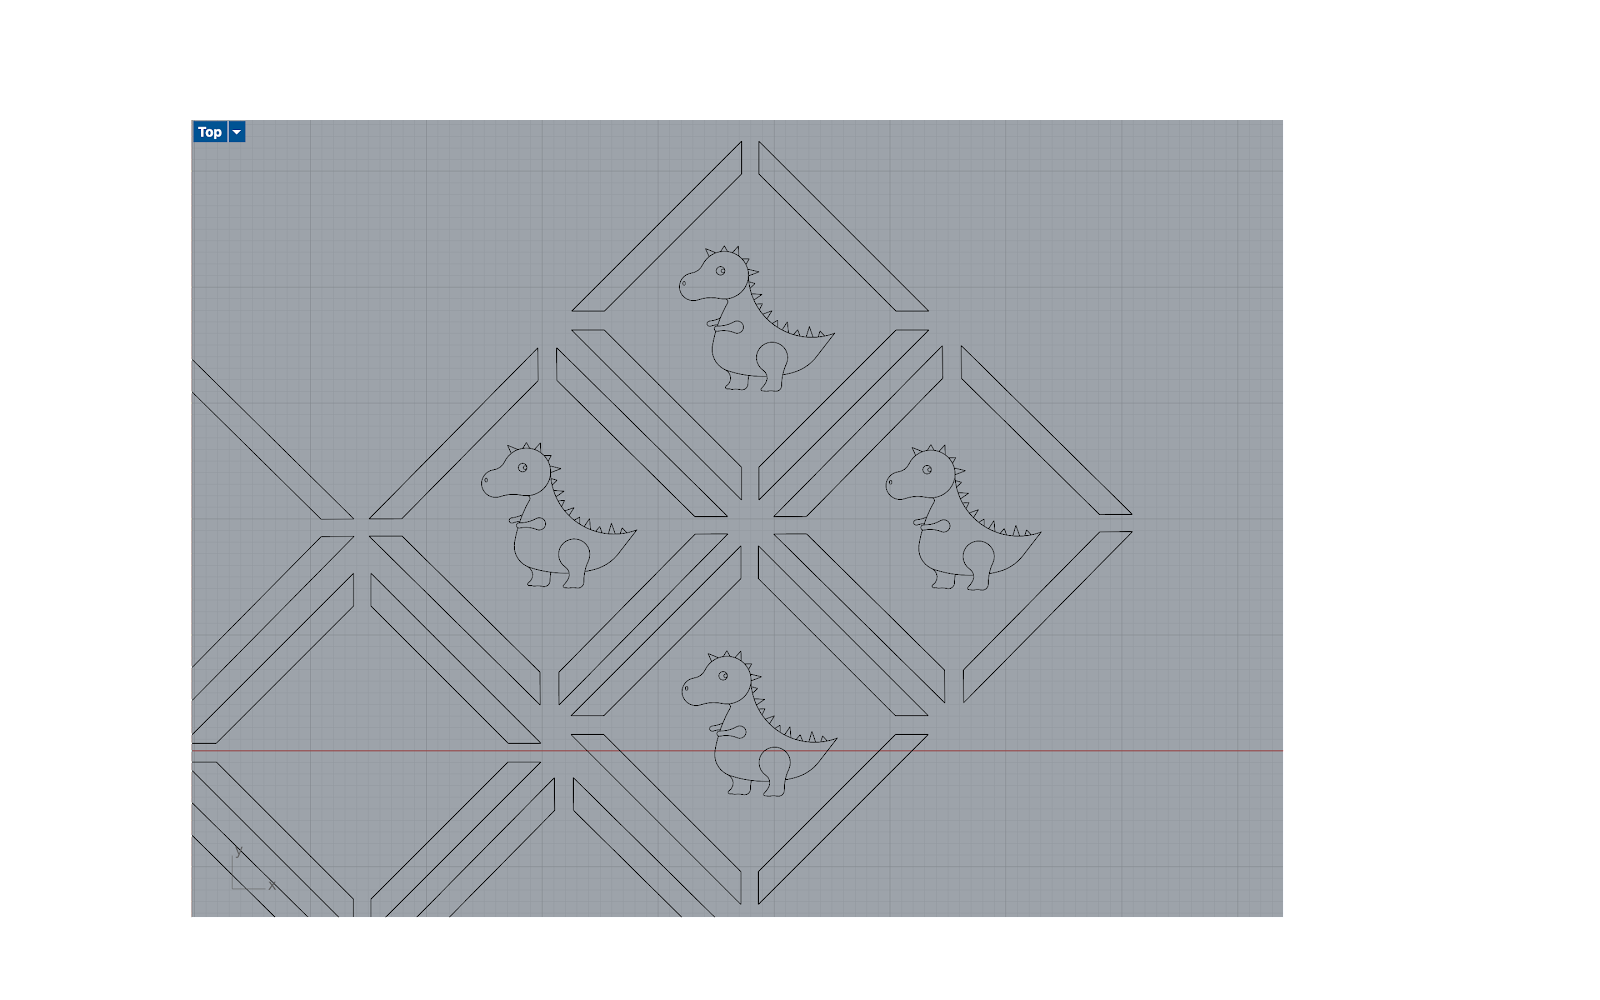

Final: In the end, I think I created a pattern that I really like! I think it’s cute and playful and could be used as a kid’s bedspread or clothing design. I think there’s a good balance between organic shapes and geometric ones. The screenshots of the pattern are not good quality so it doesn't really do the colours justice.


Comments
Post a Comment